Saturday, November 28, 2009

Vietnamese-Style Moo Shu Chive Pancakes (mù xū bǐng) with Turkey

Vietnamese food is all about the five senses: the visual explosion of colors in green basil and red chilies, the crunching sound of fresh carrots and bean sprouts, aromatic mint and fish sauces, the variety of textures for mouthfeel, and... oh yeah, taste is pretty important, too.  In fact, Vietnamese dishes rarely leave out any part of the tongue with spicy/sweet/tangy mixed with bitter herbs and salty condiments... commence Homer Simpson drool... NOW.


It seemed a natural progression for leftover turkey or any roast fowl (I used chicken, duck would probably be fantastic if I'd had some... doh!).  Turkey not being the most flavorful of meats on it's own, the kick of some cilantro and ginger sounded pretty good.  Since the leftover meat is easiest to remove from the carcass in shreds, I also thought some moo shu would work, and that would mean pancakes.  I didn't have the ingredients on hand to make Vietnamese pancakes like bánh xèo, which require rice flour and coconut water.  Therefore, I decided I'd have to go rogue and mix some Chinese moo shu pancakes (mù xū bǐng).  


I know technically this dish is a "fusion" dish, but I'm not a fan of this term, mainly because I see it over-used by restaurateurs looking to up the hip-o-meter in their menu.  I am not hip - I don't own an iPod since my last one was stolen over a year ago and I don't even miss it, I don't wear jeans that cost more than $40, and I don't get my hair cut into a style named after a celebrity.  Therefore, I feel as ill-suited to the term "fusion" as I do to, say, diet pills or Red Bull/vodkas.


So okay, the "fusion" part will stay in sarcastic little quotes, if that's okay with you guys.  Now, about these pancakes.  I found the basic recipe from Emeril Lagasse and I must not've read thru it properly the first time because I didn't realize I was essentially making pastry dough pancakes.  If I'd known that before making them, I probably would've closed the page and looked for something else to make.  Why?  Because I'm afraid of pastry dough.  Everyone makes it sound like some huge ordeal of rolling and buttering and layering... as someone who cooks way more than bakes, I just imagined myself collapsing in a tearful mess about halfway through - covered in flour with bits of dough mashed into my hair.  I'm wearing a chef's hat in this dream sequence, and it's slumped in defeat, too...


I'm glad I didn't read the recipe through properly as it turns out.  By the time I got to the layering part, I was having too much fun to care.  Yes, again this might be because I am not hip, and therefore have fun doing not-hip things like rolling dough on a Friday night, but who cares?  I was giddy with the realization that this was far from "work"; I was humming and I rolling out little disks, brushing them with sesame oil, and sticking some chives in between the layers... then a little sizzle on the griddle pan and there they were!


Pastry dough, watch out, cause I'm coming for you next...


Recipe: Vietnamese-style moo shu turkey and pancakes


What you need for the chive pancakes*...


1 1/2 cups flour (plus a little extra for rolling)
Pinch of salt
1/2 cup boiling water
2 - 3 tablespoons cold water
3 tablespoons sesame oil
A few sprigs of fresh chive, chopped coarsely


*makes 12 pancakes


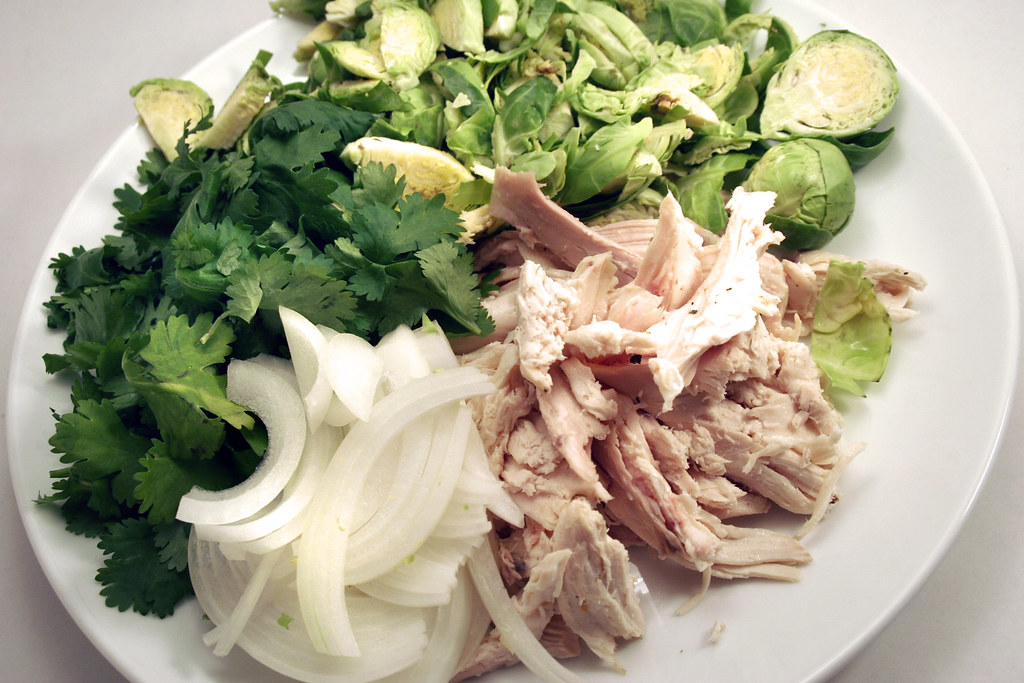
What to scrounge around for for the filling...


2 cups of shredded, cooked poultry (leftover turkey, chicken, duck, etc)
1 cup each of shredded veggies (carrots, corn, cabbage, mushrooms)
1 egg, beaten
1/2 cup of onions, scallions, etc
3 cloves of garlic
Nob of fresh grated ginger or 1 1/2 teaspoons powdered
A few dashes of fish sauce
Equal parts soy sauce and brown sugar (dissolve brown sugar in soy sauce), amount to your taste and quantity of other ingredients
Sesame oil for cooking
Salt & pepper


What you need for the garlic/chili sauce...


2 parts red chili sauce (such as sambal oelek or sriracha )
1 part sesame oil
Crushed garlic and fresh ginger (to taste)


What you need for other accompaniments...


A handful each of fresh mint, Thai basil (or sweet), and cilantro (any or all)
Fresh bean sprouts (optional)
Shredded carrots (optional)
Lime wedges (optional)
Crushed peanuts (optional)


How to make moo shu pancakes...


Combine flour, salt, and boiling water in a medium bowl, stirring with a heat-proof spoon (whisks get gummy, not recommended).  Add cold water, one tablespoon at a time, and stir until you have a slightly sticky dough (you may find you need less than 3 tablespoons for this).  Turn it out onto a floured surface and knead for 10 minutes until smooth (see figs. 1 and 2).  Cover and let rest for 30 minutes.


Divide your dough in half, roll each half into a ball and divide each into sixths (see fig. 3).  You should have 12 pieces (fig. 4).  Roll each piece into a ball.  Using a rolling pin on a lightly-floured surface, roll out each ball into a 2-inch disc (see background of fig. 5).  Stack discs in pairs, brushing some sesame oil and sprinkling a few chopped chives in between the 2 discs.  Roll out your disc "sandwiches" into 7 - 8 inch pancakes (foreground of fig. 5).  Heat a heavy skillet or griddle, brush lightly with sesame oil, and add pancakes one at a time.  Cook on both sides until blistered but not browned (fig. 6).  There will be several air pockets.  Set aside finished pancakes, covered to keep warm.


What to do for the filling...


In a wok or medium skillet, heat some sesame oil and add any uncooked vegetables and onions, adding those with longer cooking times first.  Cook until tender but still crisp.  Add your cooked shredded meat, any cooked veggies, plus ginger, garlic, soy/brown sugar, fish sauce and salt/pepper to taste.  Add your beaten egg and and toss/stir.  Heat until everything is heated thoroughly and egg is cooked (shouldn't be more than a couple minutes)


How to serve...


Combine all the ingredients for the chili/garlic sauce.  Serve along side the other accompaniments and pancakes.  Everyone can grab pancakes, add hot turkey filling, accompaniments, and a little sauce.  ENJOY!

Please vote for this recipe in the Foodista Best of Blogs Cookbook Contest!


Saturday, November 21, 2009

Brussels Sprouts w/Walnuts and Bacon: 3 Ingredient Recipe #10


3 Ingredient recipe: Brussels Sprouts with Walnuts and Bacon

I've read that a lot of the elaborate sauces invented by the French, and Roman sauces like garum , were concocted to mask the flavor of spoiled meats.  I thought about this as I worked thru the 10 days of this challenge.  Normally happy to be cooking with a spectrum of spices, I was now forced to focus on the details of my paltry ingredient lists... and while it's not like they were rotten or anything to begin with, they did have to be even better quality than the usual "it's gonna go so let's make stir fry out of it".

I'll admit this was intensely frustrating at first.  I found it amusing when friends would suggest dishes and it would be a conversation much like the process I'd go thru in my own head while putting these together: "Well you could just make a salsa and, wait, no that has 4 ingredients already... well I had this pesto cream with chicken and CRAP that's not going to work..."  You don't realized just how long the ingredient lists run in most recipes until you do something like this.

There are great things about it, though, obviously.  It's easy to go shopping for a recipe.  It has tendency to be less expensive.  It forces you to really think about each ingredient you choose.  

I think maybe my palate had been too spoiled before this.  We have so much flavor thrown at us in our food that  it can be easy to forget what the chicken tastes like outside the Kiev or the peppers before they've been stuffed.  This experiment, for me, has been like putting my taste buds on "time out" to think about just how much privilege they've had in their short lives, what with all the tandoories and tagines and tazikis available to them.  Except it turned out to be anything but a punishment.  The dishes were surprising flavorful and rich, much of that owing to the fact there was a sincere concentration, both in the cooking and in the dining process.

I really think I'll do this again sometime, and I hope you'll join me and at least watch the fun...

I thought I end this challenge with the recipe that put the idea in my head in first place: an impromptu side dish that turned into a meal.  All because Jason bought me these...


For a refresher on the rules of my 10 day, 3 ingredient challenge, check out the first post.

3 Ingredients...

  1. 1 pound of Brussels sprouts, quartered (or 1/2 the sprouts of one large stalk)
  2. 2 strips of bacon (diced)
  3. 2/3 cup walnuts (chopped and toasted in dry pan)


What to do with it...

  • Heat a large saute pan on medium heat and add your bacon, sautéing for 3 mins or until you have a some grease to cook your sprouts in
  • Add sprouts and cook for 15 mins, stirring occasionally - you want some of the sprouts to get a nice golden color and the bacon to cook (it won't get crunchy, though)
  • Add walnuts and salt and pepper

So easy, and so good!  Thanks so much to everyone who read along or contributed comments on this challenge, it's made all the difference!

Friday, November 20, 2009

Persimmon Cheesecakes: 3 Ingredient Recipe #9


3 Ingredient Recipe: Persimmon Cheesecake Cups

Ok, so I'm really excited about this one.  I wanted to do a dessert for one of the days in this challenge, but I just couldn't think of anything that didn't require lots of baking (too many ingredients) or was just fruit or gelatin or something (too easy).  One thing that makes it more difficult is that I am dessert-challenged.  While I can riff my way thru a 5 course meal without so much as glancing at a recipe, trying to make cookies without notes more often results in globby, burnt, or in some other manner inedible sweets than I'd care to admit.  No amount of pleading, threatening or tears seems to convince my ingredients to submit to my whims.

One especially memorable attempt was a batch of icebox lemon cookies that I deviated off the recipe for and ended up with more of a batter than a dough that when you placed them in the oven WOULD NOT BAKE.  They would just turn to runny, shapeless stubborn blobs and then, out of contempt for me, finally set themselves ablaze and left me with a tray of something resembling the s'mores that fall into the campfire.  I abandoned the notion of making cookies out of the remain raw paste, but since it really did have more the consistency of batter, I decided to show the goo I wasn't going down that easy and I made what I now call Cookie Dough Pancakes out of it.  They're actually quite a hit with Jason and he requests them from me all the time... so take THAT stupid jerk cookies...

Even if I manage to make a success out of my sweets experiments, however, they rarely turn out as they are originally intended.  Rather like children. So imagine my utter shock, my elation, as I removed perfect, gleaming little cheesecakes from the muffin tin.  A crossed-fingers bite confirmed it:  it was eatable.  It tasted like cheesecake.   It tasted like REALLY GOOD cheesecake!  And it had only three ingredients!  Shaking my tiny fists at the dessert gods who have for so long forsaken me, I was triumphant... and for any of my neighbors watching me from their windows from across the way, also a complete cackling lunatic.  But what did it matter?  I had perfect, airy, decadent persimmon cheesecake, and they could just watch me eat it...


For a refresher on the rules of my 10 day, 3 ingredient challenge, check out the first post.

3 Ingredients:
  1. 2 persimmons, hulled
  2. 1 8 oz package of cream cheese (softened)
  3. 1 14 ounce can of sweetened condensed milk

What to do with it...
  • Spray a standard 6-cup muffin tin with cooking spray or grease with butter
  • Puree one persimmon in a standard blender or with an immersion blender
  • With a hand mixer, whip together your cheese, persimmon puree, and 3/4 of your can of condensed milk until creamy/airy
  • Divide mixture into your muffin cups, cover with plastic wrap, and pop into the freezer for 30 mins (but not much more than that or they'll get too hard)
  • Slice your remaining persimmon into thin crescent wedges and dip in condensed milk to get a thin coat
  • Heat a little butter in a small nonstick skillet and place into the pan to "caramelize" for a moment
  • When your cheesecake cups are solid enough to remove, slide a butter knife dipped in hot water around the edges and pry each one out gently and plate
  • Arranged your persimmon wedges in a star shape on top of each cake
  • Finish them off by caramelizing persimmon tops further with a kitchen torch, or a quick moment under the broiler on high (test this on one as your broiler may not get hot enough and will just melt the cake)


NINE DOWN, JUST ONE TO GO!

Thursday, November 19, 2009

Duck Breakfast: 3 Ingredient Recipe #8


My favorite breakfast is a simple fried egg with hash browns.  I thought for this day in the challenge I'd make a breakfast, but in order to give it some richness, I decided to use duck eggs.  Having never fried a duck egg before, I wasn't sure what to expect - either from the cooking or the eating process. 

I've been reading up on the web about cooking and eating duck eggs by themselves and to some degree all the chatter made me apprehensive:  "Gamey" a couple of people said on Chowhound.  "The higher fat content makes it difficult to fry these properly and I recommend duck eggs for baking instead" came another comment. Not to be deterred from my culinary curiosity and pursuit for the best ingredients for the challenge, I researched the best/perfect way to fry my little treasures, and found that getting the eggs to room temperature so the whites and yolks cook more evenly.

To accompany the duck eggs, it only made sense to make the hash browns equally up to the duck standard.  I thought about the Belgian frite obsession (and I say understandably so) for duck fat and it became the obvious choice.  Of course, I understand not everyone can do duck fat for breakfast every weekend (I include myself in the group).  Substituting chicken fat or a combo of butter and oil works very well. I added a couple of other secrets to perfect hash browns in the recipe as well: rinse your potato shreds in cold water then drain very well, and don't salt them until they are plated.

The resulting product?  Creamy, rich eggs (no gamey-ness to be found) and crisp, flavorful hash browns.  Topped with the fried sage, they are heaven.


For a refresher on the rules of my 10 day, 3 ingredient challenge, check out the first post.

3 Ingredients...
  1. 2 duck eggs (let sit to room temp or placed in lukewarm water for 10 mins)
  2. 1 russet (or other starchy potato), shredded
  3. 5 sage leaves

What to do with it...

The hash browns...
  • Rinse your shredded potato in cold water and drain very well - I use a potato ricer to press out the most moisture possible (this step helps you get crispy, perfect hash browns) and pat dry
  • Heat some duck fat (or chicken fat or butter/oil) in a non-stick skillet on medium high heat
  • Add your shredded potato and shape to round pancake size
  • Fry on one side until golden, then remove from pan to plate and add a little more fat - make sure to keep the temp high, but not so high that fat is at smoking point
  • Invert your hash browns back into the pan to cook the raw side until golden
  • Remove to plate and add sea salt and cracked pepper
The eggs...
  • Melt a generous amout of duck fat or butter to the pan on medium high
  • When it begins to bubble, add eggs (you may want to crack into a separate bowl as the membranes on duck eggs tend to be thicker and require a little care)
  • Lower heat to medium and cook until the white is nearly done and there is just a little golden crispness to the edges
  • Remove from heat and cover - one minute for runny yolk, 2-3 for medium, 5 mins for well done
  • Add your egg to the top of the hash browns
The sage...
  • Brown some fat or butter in your pan on high and add sage leaves
  • Fry breifly on high until they start to crisp and turn golden then immediately pluck them out with tongs, one by one, and place on top of your eggs and hash browns
  • Season with a little salt and pepper 

Wednesday, November 18, 2009

Warm Orange Beet Salad: 3 Ingredient Recipe #7


Today Jason told me something I've never heard anyone say to me before: Eat your vegetables.  This has never been said to me because there has never been a need.  As a kid, I was always opting for something green over normal kid stuff.  I was the only grandchild on both sides of my family and therefore was never in short supply of sweets to test this theory, either.

The biggest contributor was my father's dad.  Growing up we lived in the same building my grandparents owned.  I would come down from the upstairs apartment and there would inevitably be something waiting for me on the landing of my grandparents' level: a candy necklace, something of the "gummy" variety, or these super-sugary juice drinks that came in red plastic bottles shaped like robots.  The last was my favorite because once the bottles were empty, I would set them up as bowling pins in the hallway and use my stuffed Popple as a bowling ball (does anybody remember those??).

Most of these sweets weren't as eagerly anticipated as the robots, though, and I'd eat maybe one or two pieces and the rest would go into "the candy drawer": the entire top drawer of my dresser which was routinely raided by my visiting friends but I could've cared less.  The real love for me was a good spinach pie, or cabbage and potatoes from a fresh corned beef roast and even a Greek dish called horta vrasta which is nothing more than boiled greens dressed in olive oil and lemon juice.... most kids wouldn't talk to you for a week if you served them what I begged for nightly.

So you see why I was so shocked to hear myself being scolded for the one thing I have always done willingly, but having been a very busy week, my veggie quotient has been shockingly paltry compared to usual.  So tonight I up the ante with this little beauty.  Inspired by those very same horta vrasta combined with a dish Jason's mother makes, it's a hearty salad that works as a whole meal (and did for me tonight!).  It uses the green tops of the beets which are really tasty and NOT poisonous as I know some people think.  They're in the same family as chards and the greens taste very similar to Swiss chard.  I mixed up the cooking methods from boiling to sautéing for added texture/flavor.  The result is a really nice, balanced and health salad that made a perfect meal!

...So go eat your vegetables before you get in trouble, too!

3 Ingredients...


1 bunch of beets with green tops
1 orange, juiced and zested
1/2 a yellow onion, sliced

What to do with it...

  • Remove greens from beets and wash everything thouroughly to remove grit and chop greens
  • Place beets into a medium pot and cover with water
  • Bring to gentle boil and cook until fork-tender (about 20 mins).  During this time you can cook the onions (see step 6)
  • When beets are cooked, drain and allow to cool just enough to handle and slip the skins from them
  • Slice the beets and set aside
  • Add onions to a skillet with some butter and cook on medium with a little salt for 10 minutes, watching that they don't burn
  • At end of 10 minutes, add orange juice to "deglaze" the pan and the remove orange/onion mixture to a medium bowl
  • In the skillet from the onions, add more butter and saute your beet greens with salt and pepper until wilted but still crisp (about 4- 5 mins) then add to your bowl with onion/orange mixture
  • Now saute your beets in the same way until they have a little golden crispness on each side (just 4 - 5 mins) and add to the bowl
  • Top with orange zest and more salt and pepper to taste


Seven down, 3 to go!

Tuesday, November 17, 2009

Tuna Steak with Spaghetti Squash Pancakes: 3 Ingredient Recipe #6


Well, I'm over the hump on the 10 day challenge and I find myself contemplating a spaghetti squash.  It's been sitting in my kitchen for a good week, waiting to be made into something tasty.  I halved and baked the squash and then contemplated one of the halves.  I had been thinking of baking and then deep-frying the ribbony flesh into crisp golden tendrils, so I heated up some oil and set to adding the shredded squash to fry.  The result was far from what I expected: The strings clung together in masses that looked like brambly, oil soaked nests.  FAIL.

Very glad I had another half, I started again, this time deciding to try just a quick pan saute in olive oil, but keep the essence of the squash in tact.  It wasn't as pretty, but I had a tasty blend of textures: vegetal and crisp.  It looked like a nice bed to serve under... something.  I had a plan for that, too: tuna steaks with a roasted garlic/peppercorn crust.  They turned out as luscious as filet mignon, but with a balanced lightness that married well with the squash.  I hope you try this, it's surprisingly good.


For a refresher on the rules of my 10 day, 3 ingredient challenge, check out the first post.

3 Ingredients...
  1. 2 tuna steaks
  2. 1 spaghetti squash - cut in half and seeded
  3. 8 cloves of garlic, roasted 
What to do with it all...
  • Preheat oven to 375 degrees
  • Place squash face up on middle rack of oven and roast for 45 mins or until fork tender - remove and allow to cool
  • Once cool enough to handle, begin using a fork to pull flesh out in ribbon-like "spaghetti"
  • Heat olive oil in a medium ovenproof saute pan on medium-high and add half of the squash "spaghetti"
  • Saute on medium-high for a couple of minutes, shaping like a pancake, then flip and repeat
  • Remove to a paper towel to drain and sprinkle w/salt and pepper
  • Repeat process w/second half of squash and set aside
  • Turn on your oven's broiler to high
  • Mash roasted garlic with a fork and add a tablespoon of roughly cracked peppercorns and sea salt to taste
  • Press the garlic/pepper paste to each of the tuna steaks on one side
  • Heat your ovenproof saute pan again on medium-high heat with more olive oil
  • Add steaks, naked side down and sear for a few moments, shaking to ensure it does not stick to bottom
  • Remove from stove and place under broiler for 2 - 4 mins depending on your broiler - you want the steaks to be just barely cooked on the outside, very pink in the middle
  • Place one squash pancake on each plate and slice tuna steaks into medallions and serve on top of pancakes


Six down, four to go!

Monday, November 16, 2009

Asian Potato Salad: 3 Ingredient Recipe #5


3 Ingredient Recipe: Scallion and Ginger Potato Salad

I love potato salad.  It's something I've made many times to bring to potlucks and I always found myself making the recipe more and more elaborate: ham and capers and artichokes.  Yes, they were tasty but at some point you can barely see the potatoes at all drowning under layers of smoked gouda and bacon.  


Here's a simple version of potato salad that uses both sauteed scallions and raw, bright citrusy ginger and nutty sesame oil.  I used a blend of Szechuan and black pepper corns, but just black pepper works nicely.


For a refresher on the rules of my 10 day, 3 ingredient challenge, check out the first post.


3 Ingredients....
  • 3 cups quartered red potatoes (or other waxy potato)
  • 1 bunch of scallions
  • 1 nob of ginger
What to do with it...

  1. Bring potatoes to a gentle boil and cook for approx. 20 mins, or until they can be pierced with a knife, but before skins start to loosen
  2. Drain and place into large bowl to cool
  3. While the potatoes cook, chop white & green portion of scallions finely, keeping separate
  4. Heat a small saute pan with enough sesame oil to coat generously and add white portion scallions
  5. Saute on medium-low until golden, about 11 mins
  6. Add sauteed scallions and raw green scallions to potatoes
  7. Grate in about a tablespoon of fresh ginger (a microplane grater works well for this)
  8. Add salt and pepper to taste and more sesame oil if desired


Just 5 more days left!

Sunday, November 15, 2009

Chicken, Sweet Potato, Leek Soup: 3 Ingredient Recipe #4


3 Ingredient Recipe: 3-Way Chicken, Leek and Sweet Potato Soup (no laughing at the title, now...)

Today I'd like to talk to you about economy.  No, not THE economy, though the subjects are intrinsically linked.  I mean food economy, and what this little experiment is teaching me about it.  Being raised by a thrifty mom, I have always known to be aware of which grocer has the best price for bulk goods and how to clip my coupons.  I have a preternatural sense for sniffing out deals - it's in my blood... but this, this is something different: something pulled down from your grandmother's kitchen shelf, wiped of it's dust, and hugged close as a family heirloom.

I am talking, maybe obviously, about using every part of your ingredients to the fullest: throwing nothing out until they've relinquished every remaining ounce of flavor and nourishment.  And so was born the concept of 3-way soup.  I couldn't think of a better name for it, so it remains a slightly suggestive title, maybe... but oh well.

This is by far the most complex of the 3 ingredient dishes I've experimented with for this challenge.  I held my breath the whole time hoping not to create a epic disaster as it requires making your own stock out of the trimmings from your 3 ingredients, plus roasting and caramelizing and frying... but as many of the steps can be preformed simultaneously, it takes a little less time than one might imagine: about 2 hours total.  I've included some of my tried and true tips for roasting chicken in this as well as a trick for caramelizing leeks without using sugar.  The result is buttery and dense and has a round mouthfeel I've rarely had in any soup.

So be forewarned, this is not a throw together dish, however, the results are well worth it, I'm proud (and relieved) to say.  Oh, and I'm forgetting the very best part: All in the cost of a meal for 4 people is, get this, a whopping $5.46.  To me, that's worth a little effort right there... I'd suggest reading thru the directions below before starting so you have an idea of how this works.  It might seem like a lot of steps, but much of this is intuitive and makes more sense once your understand the context of each line.


For a refresher on the rules of my 10 day, 3 ingredient challenge, check out the first post.


The 3 Ingredients...
  1. 4 chicken pieces w/bones and skin (combo of thighs and breasts suggested)
  2. 2 large leeks, split and washed thoroughly of grit
  3. 3 sweet potatoes, peeled (reserve peels) 

What to do with it...

For the roasted chicken...
  • Preheat oven to 450 degrees and coat your chicken with melted butter and cracked pepper (no salt)
  • Add chicken to a heavy ovenproof skillet or roasting pan and place on bottom rack of oven
  • Roast for 35 - 40 mins or until internal temp is 175 degrees (at this point see sweet potato steps)
  • Remove and allow to cool then separate meat from bones and skin, saving everything
  • Chop meat and add salt and pepper
  • Pour pan drippings into gravy separator or use spoon to separate fat and juices - juices will be added to stock and fat will be used for the last step
Prepping leeks...


  • Trim bottoms and dark green tops and reserve for stock
  • Thin slice your remaining white portions and divide out 1/4 cup for your last step, the rest will be caramelized

For the stock...
  • Add your leek bottoms, sweet potato peelings, chicken bones, skin and pan juices (reserve fat) to a large stock pot and add about 10 whole peppercorns
  • Pour enough cold water to cover plus one inch and bring to a boil
  • Reduce to a simmer and cook for at least 1 hour, skimming fat occasionally
  • After cooking, allow stock to cool then strain thru mesh colander or cheesecloth into large heat-proof container and then return strained stock to the pot
For the sweet potatoes...
  • While the chicken is roasting, cut all but 1/3 section of one potato (or about 1/4 cup) into a small dice - cut the remain 1/4 cup into julienne strips for the fried shoestring sweet potato topping at the end
  • Heat a heavy-bottom, ovenproof pan over medium heat and add 3 tablespoons of butter
  • Add diced sweet potatoes and saute until golden, then remove from pan and set aside
  • Keep pan on the heat and add 1 more tablespoon of butter for the caramelized leeks...
For the caramelized leeks...
  • Add all but 1/4 cup white portions to the sweet potato pan (the brown bits from the potatoes will help caramelize leeks) and 2 pinches of salt
  • Saute on medium until they just begin to turn brown, then reduce to lowest heat and cook for 45 minutes, stirring occasionally to make sure they are not burning
  • At the end of 45 minutes leeks should be very soft and deep golden color
Compiling the soup...
  • Bring your reserved stock to a gentle boil and then add sauteed sweet potatoes
  • Cook until potatoes are just soft then add your caramelized leek mixture
  • Reduce heat to a simmer and use an emulsion blender or fork to cream about half of the soup (be sure to leave it chunky)
  • Add chicken and salt and pepper to taste
Making the fried leek and sweet potato shoestring topping...
  • Spoon reserved chicken fat into a skillet (add some butter if there's not enough)
  • Toss in julienne potato in and fry on medium-high heat until golden, remove to paper towel to drain
  • Add your reserved 1/4 cup leeks to fat and fry until golden, remove to paper towel to drain
Serve soup in individual bowls topped with a little fried leek and sweet potato shoestrings!


4 down (and that was a doozy!) 6 to go!

Saturday, November 14, 2009

Curry Shrimp with Oyster Mushrooms: 3 Ingredient Recipe #3


3 Ingredient Recipe: Curry Shrimp w/Oyster Mushrooms

There are several Vietnamese/Chinese/Korean markets just a couple of blocks from my house.  They're surrounded by Peking duck specialty restaurants and the best Pho available in Chicago.  Between Little Vietnam and the gastronomiphile (made up word) establishments of my Andersonville neighborhood, I feel blessed to live in what I believe, in my humble opinion, to be the new epicenter of Chicago good eats.

Tonight was a night spend with some of my dearest friends.  I felt guilty dragging them into my little blog challenge, but thankfully I have the best friends I could ever ask for and not only were they game, they let me drag them to one of the local Vietnamese markets and together we hatched a plot for tonight's 3 Ingredient Challenge.

After debating over bitter melons, silkie chickens (with black skins!) and something cryptically labeled "phallicialia" that we could only guess might be bull's penis, we settled on some fresh head-on prawns in a bin and oyster mushrooms.  This is where I admit a fault of mine:  I am weirdly freaked out by crustaceans.  I like to eat them.  I like to cook them.  I DO NOT LIKE TO SEE THEM IN THEIR ORIGINAL SHELLS.  It nauseates me.  Something in the little antennae and beady bug eyes I no likey.

Every time this comes up, I tell myself to suck it up.  If I'm going to be a cook, I gotta learn to love me some crawdads and lobster and ACK... shrimp with crawly legs and big black eyes.  Some whimpering, pleading and a quick heebie jeebie dance later and we had a nice bag of the prawns collected and away we go... me a little blanche-pale but determined not to be a baby.

The third ingredient was tricky because we needed something that would go well with both mushrooms and shrimp, two ingredients rarely seen together, but would also be able to pack a flavorful punch.  Surveying my cupboards, one of my brilliant cooking buddies suggested turmeric, which then led to the natural progression of curry.  Yes, Curry Shrimp and Mushrooms!


With the help of some good wine, we decided that to get the most of our 3 lowly ingredients, we would broil the shrimp and dry toast the mushrooms in a skillet.  The results were a success: hearty mushrooms, succulent shrimp and a curry sauce to bind it all nicely.  Happy tummies, good friends... is there anything better?  I conclude not.


For a refresher on the rules of my 10 day, 3 ingredient challenge, check out the first post.


3 Things to get...

  1. 1 pound of raw shrimp
  2. 2 cups of oyster mushrooms - trimmed
  3. Curry powder
What to do with it...
  • Toss shrimp with some melted butter and place in a broiler pan that allows juices to be caught, or create an aluminum tray - if you have shell-on shrimp, keep them this way during broiling and remove skins/clean after allowing to cool
  • Broil on high until just pink, turning once (time depends greatly on your broiler)
  • When shrimp are done, remove to a separate plate, reserving the butter/liquid
  • Heat a skillet on high and add oyster mushrooms.  Toast on high until golden on both sides, remove and set aside
  • In the same skillet, melt 2 tablespoons of butter and add your shrimp cooking liquid and curry powder to your taste
  • Add back mushrooms and shrimp and toss
  • Add pepper and salt to taste


3 down, 7 to go!

Friday, November 13, 2009

Roasted Cauliflower Pasta: 3 Ingredient Recipe #2


3 Ingredient Recipe: Roast Cauliflower Pasta w/Goat Cheese

Day two of my challenge got some help from a post from TheKitchn.com .  I subscribe to the site's newsletter and yesterday as I hashed over ideas for getting more flavor out of 3 ingredients, I received their email with piece called How To Roast Any Vegetable .  As I was planning on making a dish today that I knew would have cauliflower in it, this was perfect.


This recipe for a simple pasta dish gives you a chance to take notice of individual textures and find nuances in a common vegetable normally found pan fried, boiled or muted in sauces or breadings.  Here the roasted cauliflower is crisp, bright and smoky.  Tangy goat cheese is sauteed to create a caramelized crust and oozing rich center.


For a refresher on the rules of my 10 day, 3 ingredient challenge, check out the first post.

3 things to get...
  1. 1 head of cauliflower - chopped
  2. 4 cups of bow tie pasta (or similar)
  3. 8 ounces of goat cheese (tube shape preferred)


What to do with it...


  • Preheat oven to 425 degrees
  • Toss cauliflower in olive oil to coat, paying special attention to coat the floret tops so they brown evenly
  • Place cauliflower into a roasting pan and roast for 20 minutes, checking occasionally and shaking/turning to get even browning
  • Cut half the goat cheese into 1/4 rounds and set aside
  • Prepare pasta according to instructions and drain, place in large bowl
  • Toss hot pasta with the uncut half of your cheese and 2 tablespoons olive oil and set aside, covered
  • Heat enough olive oil to a skillet to coat bottom evenly
  • Add your 1/4 cheese rounds and saute on medium heat for 1-2 minutes until brown, watching carefully
  • Carefully flip rounds with a metal spatula (cheese may cling to rubber/wood) and saute another 1-2 minutes, then transfer to paper towels to absorb excess oil
  • Remove your roasted cauliflower from the oven and add to pasta along with salt and pepper to taste
  • Serve immediately in individual bowls topped with sauteed goat cheese rounds


2 down, 8 to go!


Thursday, November 12, 2009

Roast Pepper Chicken with Acorn Squash: 3 Ingredient Recipe #1


3 Ingredient Recipe: Chicken with Roasted Peppers and Acorn Squash

One of the challenges of 3 ingredients is getting a rich, full flavor and texture with limited options.  With this dish I tried to create a rich sauce out of 2 ingredients.  The result was buttery and rich, and with the addition of a good amount of cracked pepper, it had a kick, too!


For a refresher on the rules of my 10 day, 3 ingredient challenge, check out the first post.

3 things to get...
  1. 4 chicken leg quarters
  2. 6 ounces of roasted red peppers*
  3. 1 medium acorn squash, cubed (you can leave skin on, or peel if you're industrious)  
*Prepared, jarred peppers were used for acidity


What to do with it...

  • Preheat oven to 400 degrees
  • Heat a large oven-proof saute pan over medium heat and add 1 tablespoon butter
  • Sprinkle kosher salt/cracked pepper on chicken
  • Add chicken to your pan and saute on each side until brown, then transfer to a roasting pan and add to oven.
  • Start timer for 45 mins, keeping the pan with drippings on the stove on low heat for the next step
  • In the same pan used for the chicken, toss in squash and saute until golden and then transfer pan to oven (keeping the squash in it's own pan will help keep flavors separate/distinct until plating)
  • While chicken and squash are roasting, add roasted red peppers to a food processor and pulse until it's the consistency of a chunky paste (you can also use ajvar for this)
  • After 45 mins, remove chicken and squash from the oven and transfer half of the squash and all of the chicken to a large plate, reserving the chicken drippings
  • Remove the skins from the remaining half of squash in the pan and add your pepper mixture
  • Pour the chicken drippings from your roasting pan into the pepper/squash mixture
  • Return the pan to the stove on low heat and begin mashing the squash to incorporate into the sauce
  • Season with general cracked pepper and salt to taste
  • Serve sauce over the chicken along with the roasted squash


One down (small 'hurrah!), 9 to go...


The Chickenless Kitchen 30 Rock Challenge!

My fellow food blogger over at the Chickenless Kitchen posted a challenge a few days ago: Create a recipe inspired by the show 30 Rock.  Well I can't resist a challenge that is TV related (food and TV pair so well together), and definitely can't resist a chance to post about 30 Rock.


Tina Fey feels like my long lost, much more successful sister.  I'm told I look like her all the time, a fact that is not surprising I guess considering we are both half Greek on our mother's sides.  She has lived in PA and Chicago (like me), and, most importantly, she enjoys FOOD and is not afraid to make a fool out of herself if it makes people laugh.  I'm going to stop with the comparisons now because they'll begin to border the creepy/stalker variety and just get on to the recipe... oh, and also my nickname has been "Tina" for years and years before I knew who Tina Fey was... OK, that was the last one, I promise!  To the challenge!


Being that there is the Greek connection there, I thought I'd do a recipe that works with that.  I decided to brush off the Greek cookbook passed down from my YiaYia, very cleverly named "The Art of Greek Cookery"...gotta love 1960's cookbooks for their creativity.  This is also inspired by the "Night Cheese" scene in 30 Rock...


So without further ado, I bring you...


Night Cheese: The Recipe


1 pound of kasseri cheese
1 pound of fresh mozzerella
1 pound of feta
1 lemon
Olive oil
Flour for dredging
Assorted olives (including kalamata)

  1. Directions: Cut all the cheese into 1/4 inch thick pieces and dredge in flour.
  2. Heat the oil in a medium skillet and add cheese pieces.
  3. Brown on each side, 1.5 min for kasseri, 1 min for softer cheeses.
  4. Remove to dish and serve with olives, a few squeezes of lemon juice, and drizzle olive oil.

OPA!


I'll be posting my first 3 ingredient challenge recipe today so stay tuned for that later!

Wednesday, November 11, 2009

10 recipes. 10 days. 3 ingredients.


Why...?

It has a lot to do with 2 meals and 2 burnt hands. Not making sense?  I'll explain.

Not too long ago Jason gave me the gift of Brussels sprouts.  A friend and I stopped by his apartment and we planned to grab a quick bite when he paused at the door with "I've got something for you... it's nothing big, but the moment I saw it I thought of you."  Over to his undersized fridge where he pulls out a tall stalk of Brussels sprouts like it was Mary Poppins' magic carpetbag.  The stalk was large enough to feed, well... Brussels.  He guesses I'm happy with my gift.  I am, afterall, jumping in place while clapping my hands in glee.

It was decided that lunch would be indoors and self-made as there was no time was wasted de-sprouting and prepping the buds of my very own jolly green giant.  This turned out to be no easy task, as there had to be a good 75 - 80 sprouts on this beast (they can have up to 100 per plant).  But with a trio of workers we had those puppies stripped and quartered as efficiently as leaf cutter ants and it was time to cook.

I'd found Jason's largest pan - an ancient behemoth lurking under woks and cast iron.  In went some cut strips of bacon to sizzle and then we piled in the sprouts.   Even with its capacious girth, the pan could barely contain this mountain of cabbage-y goodness.  They were left to caramelize and fuse with the bacon fat, creating a dense, bright complexity that absolves the vegetable of a thousand childhood whines its ancestors endured when they were served at the table.  Add a couple of handfuls of walnuts, and you have reached vegetal bliss.


There was nothing left to do but toss in some cracked white pepper; A slightly prolonged task at Jason's house as he didn't possess a working pepper mill.  His kitchen is full of these charming disparities: a microplane grater but no potato peeler, several varieties of dried gourmet mushrooms... but not a spoon larger than "tea" in any drawer.  It's the kitchen of a lover of finer things, but still the remnants of a busy bachelor who eats on the run. I make a note to start picking up things to contribute to his cabinets to fill the blanks.  I realize now, however, that I have since confiscated (he did offer!) his microplane, thus depleting, instead of adding to his cupboards.  Bad girlfriend!

We sat down to enjoy what I personally feel is the most friendly dish of Brussels sprouts a person can have, and I suddenly thought, just how many ingredients are there in this?  The pepper didn't really count, or the salt I'd added, which just left sprouts, bacon and walnuts3 ingredients.  A simple dish where each element leaves the next uncrowded: a community-share of harmonic flavor.  And an idea for a self challenge was hatched...

Ah, and yes, somewhere along the in the cooking process a glob of hot bacon fat managed to explode onto my hand just as it was closest to the flame while I added the sprouts; a wound which I was destined to repeat just days later as I prepared yet another 3 ingredient recipe... but that story is for tomorrow.

The first recipe will be posted on the 12th (tomorrow), and don't think you've heard the last of the Brussels sprout...

Brussels Sprouts on Foodista

Tuesday, November 10, 2009

Spicy Italian Pickled Okra or: How I Stopped Worrying and Learned to Love Preserving

When I was nine my family moved from Chicago to a farmhouse in Elizabethtown, PA for one year. I remember this time as some of the most fun I had growing up.  Being city raised, everything was novel to me at first and I ran around pretending to be a hardened New Yorker proclaiming everything I saw "quaint".

Once the novelty wore off, however, I realized I had a genuine love for this kind of living.  There were deer and groundhogs and all kinds of wildlife for me to imagine I was Snow White with. A possum routinely walked to the school bus with me with her baby clinging to her underside.

I was introduced to a new vocabulary filled with verbs like hoeing, planting, and my favorite: canning.  The concept of having fruit trees in your backyard and picking raspberries to take into the house to MAKE jam boggled my mind. Jam was something that came in jars bought from the store. It seemed as odd to me to make it yourself as to build your own car to drive around in.  I didn't come around to the idea until I had a taste of the first batch: bright and more "fruity" than "sugary"... and I had made this myself.  It was a high I would seek out for the rest of my life.

As an young adult back in Chicago, I didn't do too much canning. I think it somehow just didn't seem cool. "Wait, you spent half the day stuffing food into jars that you could've just bought at the store?!", I imagined my friends saying as they rummaged thru my fridge.  They would suddenly look at me in a new light: a hermit with no social life making her own tepanade while singing show tunes to her cat.  While that wasn't too far from the truth, I didn't want the telltale jars lurking around my kitchen to prove it.

Fast forward a few years with the economy sliding down the drain and those fancy jars in Dean & Deluca's suddenly aren't looking like the end all for chic food choices.  Yes, they look beautiful and taste delicious.  But they cost as much as a week's groceries and could easily be made at home for a fraction.  The cuisine community has picked up on this and resurrected the trend of canning for the haute food lifestyle.  Elevated by fantastic articles like the New York Times' Preserving Time in a Bottle, the jarred recipe is now a fashionable keepsake of the crafting trend.


Finally absolved of any "uncool" vibes and armed with fresh herbs from my little city planting boxes, I got to work.  I had purchased some pickled okra a while back that I had really enjoyed, so this was the obvious choice for my first vinegary victims.  The process came back to me slowly, but as I plunged the jars into the boiling hot water to sterilize them, I remembered being nine again and thinking of how silly this all was, how pointless and then... how utterly miraculous.


The recipe is adapted from Alton Brown's.  He's a good country boy himself so I especially love any recipe of his that includes a nod to his heritage.  I also don't trust my own acid/salinity ratio judgment, so it's good to have the foremost scientific cook help out!  I've used some purple basil that had grown like weeds for me (a miracle), as well as some red onions and yes, some red wine.  This gave the okra a beautiful ruby brine that contrasts nicely with the bright green pods. The resulting product has a great crunch and a burst of flavor that manages to be zesty (fun word) and earthy at the same time. 

I hope you'll try some pickling soon.  Afterall, it's what all the cool kids are doing...

Recipe: Italian Spicy Pickled Okra


What you need...

Equipment: 4 pint sized canning jars.  See the Alton Brown recipe for sterlizing/canning tips

2 lbs fresh okra (try to get small, young ones, the older ones get "woody")
4 red chilies (such as Cayanne), split
8 cloves of garlic
4 sprigs of purple basil or 12 leaves of sweet/Italian basil
1/2 a red onion, cut into slivers
1 teaspoon whole peppercorns

1 teaspoon whole coriander
1/4 cup kosher salt
2 cups rice wine vinegar
1 cup bottled water
1 cup red wine

What to do with it all...

  1. Divide the chilies, garlic, basil, onion, peppercorns and coriander between the 4 jars and place in the bottom
  2. Wash and trim okra, then add to jars.  They should be standing vertically, and alternating stems up and down to maximize jar space.
  3. Set jars on a non-conductive surface like wood or formica with a towel under them.  Cold surfaces like marble or stainless steel can cause jar breakage from glass cold shock.
  4. In a saucepan bring salt, vinegar, and water to a boil.  Add wine, then pour immediately over okra, leaving space between top of liquid and top of jar lid.  Seal lids and set in a cool dry place like your pantry for 2 weeks.

Garlic Okra Pickles on Foodista

LinkWithin

Related Posts with Thumbnails